Are you a B2B buyer considering LVP flooring for your basement projects, but unsure about the unique challenges and best practices? Do you want to ensure a durable, moisture-resistant, and aesthetically pleasing installation every time? Discover how to expertly navigate basement LVP flooring installation.
To successfully install LVP flooring in a basement, you must first prepare the subfloor by ensuring it is clean, dry, and perfectly level. Then, lay the planks following a planned layout, pressing each firmly into place. After installation, use a roller to ensure strong adhesion and clean any excess adhesive for a professional and lasting result.
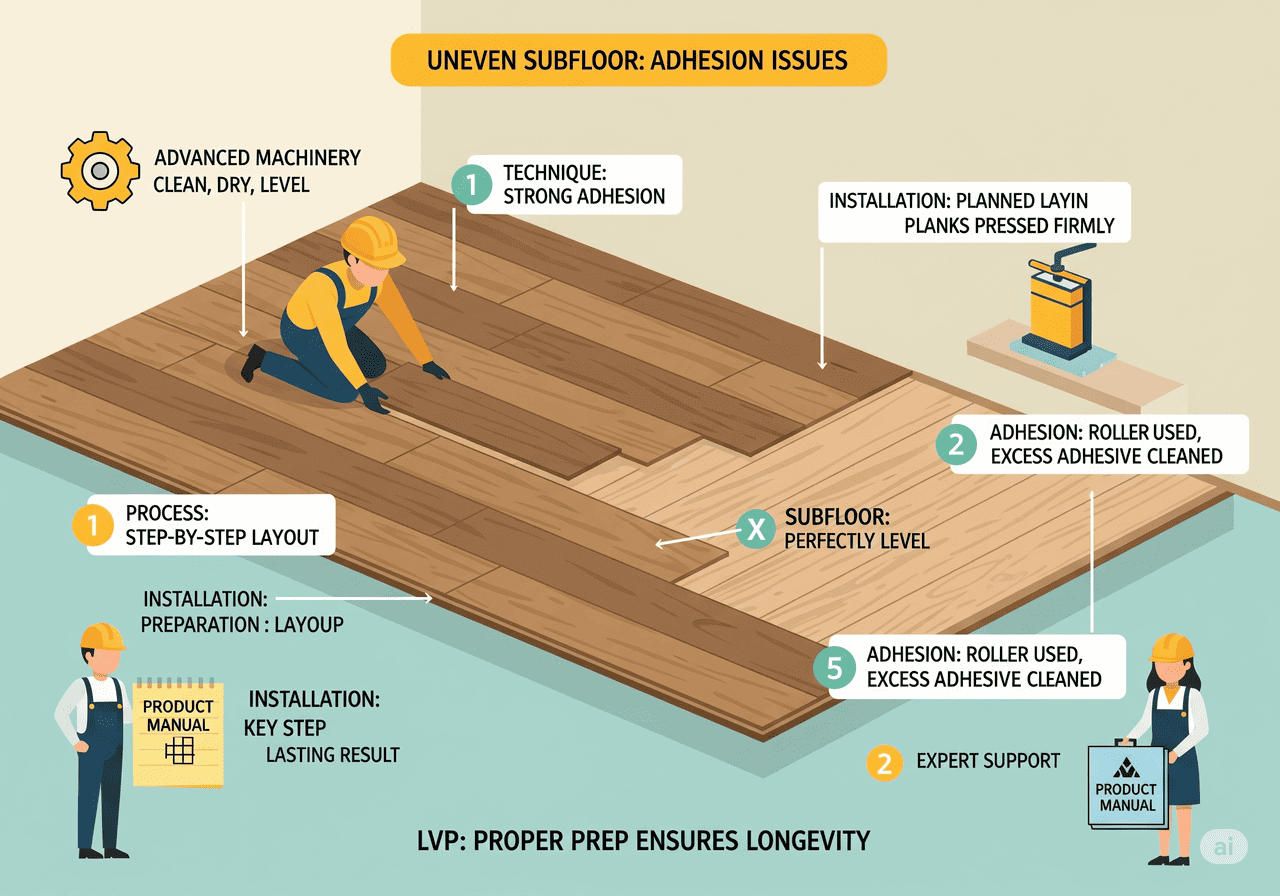
I often discuss installation processes with my clients, like Aiden and Lori. Basements present unique challenges that can impact even the highest quality LVT or SPC flooring if not addressed correctly. Many of our products, including LVT and SPC, are excellent choices for basements due to their waterproof nature.
This guide provides a comprehensive overview of installing Luxury Vinyl Plank (LVP) flooring in a basement, addressing challenges, installation methods, underlayments, product characteristics, radiant heating compatibility, and a comparison with epoxy coatings. It is crucial to understand the distinct steps needed for a successful basement installation. This guide will walk you through preparing for, installing, and optimizing LVP flooring in these challenging environments.
What Are the Primary Challenges and Preparations for Basement Flooring Installation?
Are you concerned about moisture and unevenness in your basement? Do you know how these common issues can impact your flooring investment? Understand the key challenges and the vital preparatory steps to ensure a flawless installation.
The primary challenges for basement flooring installation include pervasive moisture, significant temperature fluctuations, and often uneven concrete subfloors. Essential preparations involve thorough moisture testing, comprehensive cleaning, leveling the subfloor, and allowing flooring materials to properly acclimatize to the basement environment.
Overcoming Basement Specifics for a Solid Start
Installing flooring in a basement is different from installing it in other parts of a building. Basements are prone to distinct environmental factors that demand extra attention during preparation. My clients, especially those dealing with varied climates like in North America or the UK, frequently ask about these specific issues. Addressing these challenges head-on ensures our top-quality LVT and SPC flooring performs as expected, offering durability and longevity. Basements pose unique challenges for flooring installation due to their environmental and structural conditions.
Here are the primary challenges and necessary preparations for basement flooring installation:
-
Moisture and High Humidity:
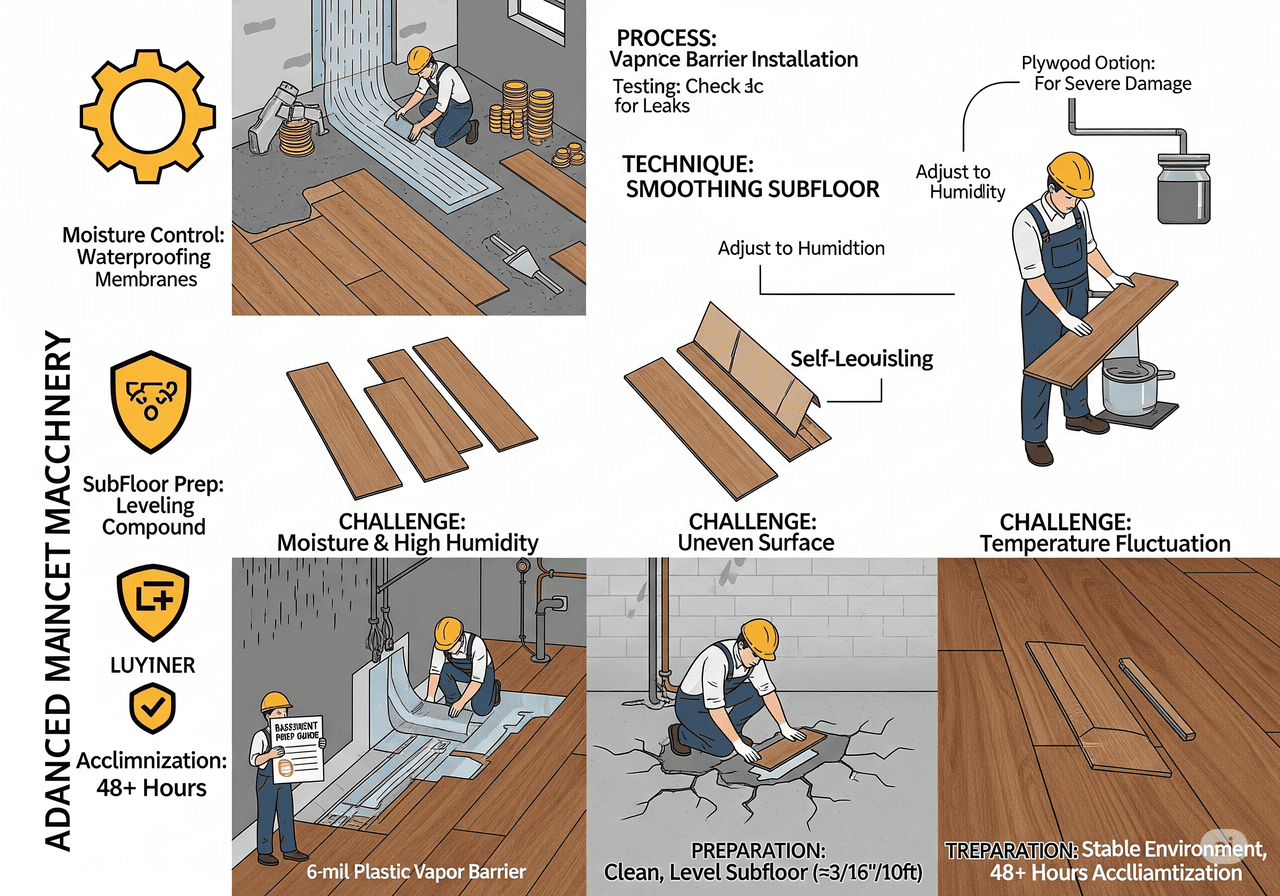
- Challenge: Basements are prone to dampness, which can lead to mold, mildew, or flooring damage. This includes constant moisture and high humidity, which can cause issues like mold growth, mildew, and adhesive failure if not controlled. Moisture can seep through concrete slabs.
- Preparation (Moisture Control): Ensure the basement is dry by checking for leaks and improving drainage with proper site grading or installing a sump pump and backup system. Use a 6-mil plastic vapor barrier to prevent moisture from rising through the subfloor. Waterproofing membranes, such as dimpled plastic matting, can create an air gap for added protection.
-
Threat of Flooding:
- Challenge: Basements can experience chronic flooding, which can ruin flooring and require robust drainage solutions.
- Preparation (Flooding Prevention): Address flooding risks by ensuring proper drainage systems. Select flood-resistant flooring like LVP, which can be pulled up, dried, and reinstalled if necessary.
-
Uneven Surface:
- Challenge: Concrete subfloors may be uneven, cracked, or sloped, affecting flooring stability and can transfer through the LVP, creating visible bumps or dips and compromising the bond between the flooring and the subfloor. An uneven surface can reduce the durability and aesthetic appeal of the floor.
- Preparation (Subfloor Preparation): The subfloor must be clean, dry, and perfectly level. First, clean the entire area thoroughly, removing all dirt, dust, and debris. Then, inspect the subfloor for any cracks, holes, or uneven spots. Fill cracks and holes with a suitable patching compound. For significant low spots, use a self-leveling compound to create a smooth, flat surface. If the subfloor is severely damaged, install a plywood subfloor over the concrete, ensuring a vapor retarder is placed between untreated wood and the concrete. High spots should be ground down. The goal is a subfloor with minimal variation, usually no more than 3/16-inch over a 10-foot span.
-
Low Ceiling Heights:
- Challenge: Adding flooring can reduce ceiling height, which may conflict with building codes.
- Preparation (Ceiling Height Considerations): Choose low-profile flooring to maintain adequate ceiling height and comply with local building codes.
-
Temperature and Humidity Fluctuations:
- Challenge: Basements can experience more extreme temperature and humidity swings than upper levels. This can cause flooring materials to expand and contract, leading to gaps, warping, or even damage over time.
- Preparation: Acclimatize the LVP flooring. This means bringing the flooring into the basement area and letting it sit in its unopened packaging for at least 48 hours, or even longer, depending on manufacturer recommendations. This allows the planks to adjust to the specific temperature and humidity of the basement before installation. Maintaining a stable environment during installation is also important.
-
Potential for Radon Gas:
- Challenge: In some regions, basements can be prone to radon gas buildup, a naturally occurring radioactive gas that can be harmful. While not directly a flooring challenge, it is a basement environment consideration.
- Preparation: While LVP itself does not mitigate radon, it is important for buyers to be aware of radon testing and mitigation practices for basement health. If radon is a concern, a proper radon mitigation system should be installed before any flooring.
Addressing these challenges with meticulous preparation ensures the LVP flooring from CloudsFlooring will perform optimally in a basement environment, providing a beautiful and long-lasting solution for your clients.
| Challenge | Description |
|---|---|
| Moisture and High Humidity | Basements are prone to dampness, which can lead to mold, mildew, or flooring damage. |
| Threat of Flooding | Chronic flooding can ruin flooring, requiring robust drainage solutions. |
| Uneven Surface | Concrete subfloors may be uneven, cracked, or sloped, affecting flooring stability . |
| Low Ceiling Heights | Adding flooring can reduce ceiling height, which may conflict with building codes. |
| Temperature Fluctuation | Basements can experience more extreme temperature and humidity swings, causing materials to expand and contract. |
| Dust and Debris | Accumulation of dust and debris can weaken adhesive bonds or create bumps under the flooring. |
| Radon Gas | In some regions, basements can accumulate radon gas, a naturally occurring radioactive gas. |
Which Flooring Installation Method Is Best Suited for Moisture Control in Basements?
Are you wondering which LVP installation method offers the best defense against basement dampness? Do you want to choose a method that provides superior moisture protection for your clients? Understand why certain installation approaches excel in moisture-prone basement environments.
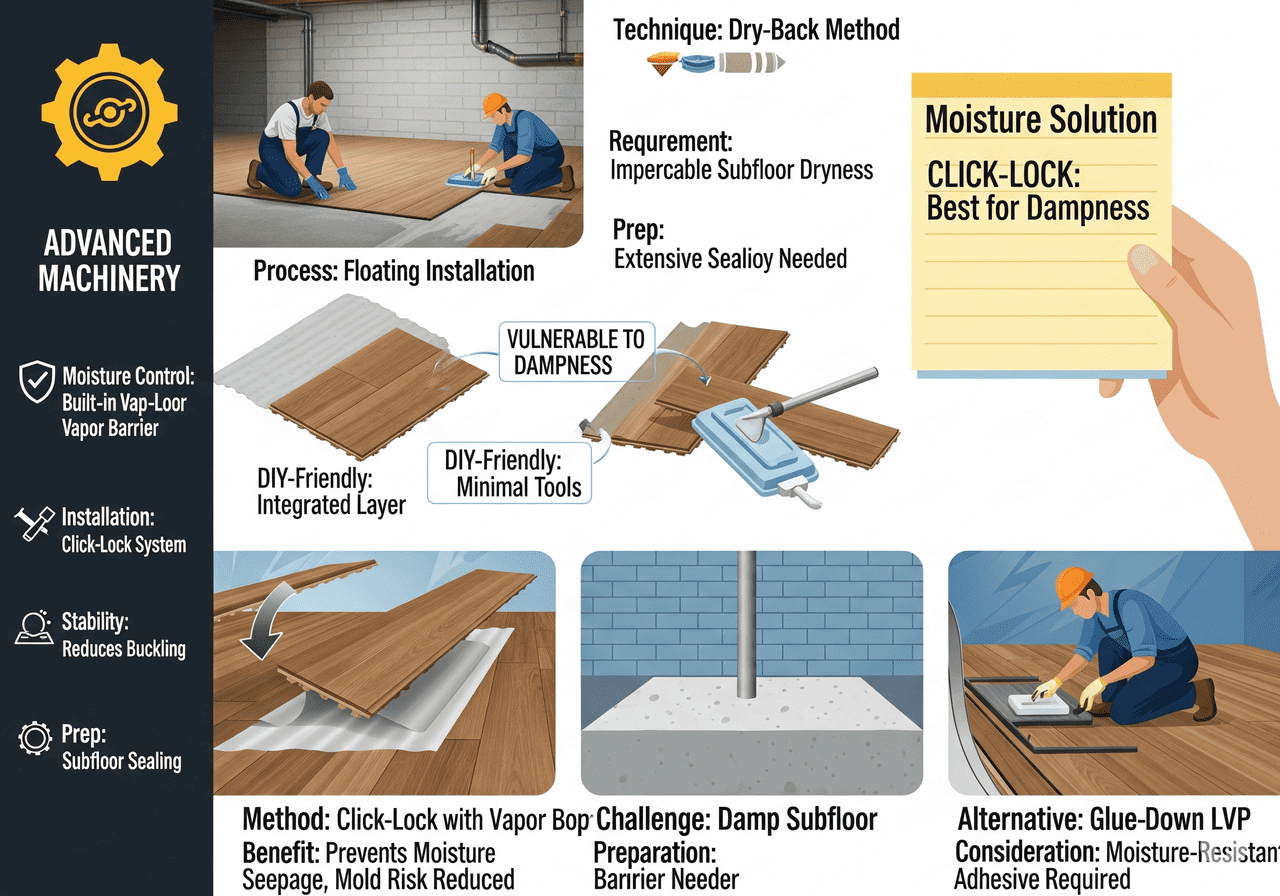
For optimal moisture control in basements, installing LVP flooring with a click-lock system and a built-in vapor barrier is highly recommended. This method prevents moisture from seeping through the subfloor into the living space, reducing risks of mold and damage, and ensures the floor remains stable and protected.
Securing Your Basement Against Dampness
When it comes to basements, moisture is the enemy of any flooring. That is why choosing the right installation method is as crucial as selecting quality LVP, like the durable options we manufacture at CloudsFlooring. While some LVP comes in dry-back or self-adhesive formats, the best approach for basements focuses on creating a robust barrier against rising damp. Lori, my COO client from the US, often stresses the importance of waterproof solutions for their large-scale projects, and rightly so. The floating installation method is the most suitable for LVP in basements due to its ability to accommodate moisture fluctuations.
Here is why certain installation methods are best suited for moisture control1 in basements:
-
Luxury Vinyl Plank (LVP) with Built-in Vapor Barrier:
- This option stands out as a strong contender for basements. It combines the realistic look of wood with superior waterproof performance. Many LVP products today feature a click-lock system, making installation relatively straightforward and often DIY-friendly.
- The crucial element for moisture control is the "built-in vapor barrier." This integrated layer provides an extra line of defense, preventing moisture from seeping directly through the subfloor and reaching the living space. This is a significant advantage over standard vinyl tiles or planks that might not have this integrated protection.
- This barrier works by creating a protective layer that resists water vapor. It helps keep the LVP stable by minimizing direct exposure to any latent moisture coming from the concrete slab.
-
Click-Lock (Floating) Installation2:
- Many LVP products designed for basements use a click-lock system. This means the planks snap together without needing to be glued directly to the subfloor. This creates a "floating floor". In this method, LVP planks are connected via a click-lock system and float over the subfloor without adhesives, allowing the flooring to expand and contract with humidity changes.
- A floating installation is beneficial in basements because it allows the floor to expand and contract slightly with changes in temperature and humidity, reducing the risk of buckling or gapping. More importantly, it does not rely on adhesives that can be compromised by moisture. This approach is particularly effective in basements, where moisture levels can vary significantly.
- When combined with a proper vapor barrier (either built-in or as a separate underlayment), this method offers excellent moisture protection by creating a buffer zone between the concrete and the LVP. It helps prevent moisture from getting trapped underneath, which could otherwise lead to mold or adhesive failure.
- Advantages of Floating Installation: This method prevents the flooring from being trapped against a damp subfloor, reducing the risk of damage. It simplifies installation, making it DIY-friendly with minimal tools. It also allows for easy removal and replacement in case of flooding.
-
Considerations for Glue-Down (Dry Back) and Self-Adhesive LVT/LVP:
- While CloudsFlooring also produces dry-back and self-adhesive LVT/LVP, these typically rely on adhesives. In a basement environment, adhesives can be vulnerable to moisture. Alkaline moisture vapor from concrete can weaken adhesive bonds over time, leading to issues like seam separation, bubbling, and peeling.
- Alternative methods like glue-down installation are less recommended for basements, as it can trap moisture and make repairs more difficult. If using dry-back or self-adhesive in a basement, an extremely robust moisture barrier or sealant applied directly to the concrete subfloor before laying the adhesive LVP is absolutely essential. The subfloor must be impeccably dry and free of any residual moisture, and specific moisture-resistant adhesives must be used. However, the click-lock system with a built-in barrier generally offers a more reliable and less complex moisture control solution for basements.
By choosing LVP with an integrated vapor barrier and a click-lock system, you provide a robust, long-lasting flooring solution that effectively manages moisture, a key concern for any basement project.
| Installation Method | Moisture Control Benefit | Considerations for Basements |
|---|---|---|
| LVP with Built-in Vapor Barrier | Integrated layer blocks moisture transfer from subfloor. | Superior protection, less complex than separate layers. |
| Click-Lock (Floating) System | Allows floor to "breathe," reduces adhesive reliance, prevents buckling. | Needs accompanying vapor barrier (built-in or separate). |
| Glue-Down (Dry Back) | Relies on adhesive bond; potential for moisture compromise. | Requires robust subfloor sealing and moisture-resistant adhesive. |
| Self-Adhesive | Adhesive directly exposed to subfloor; vulnerable to dampness. | Least recommended without extensive subfloor prep and moisture control. |
What Crucial Underlayments or Vapor Barriers Are Needed for Basement Flooring?
Are you unsure if your basement flooring needs an extra layer of protection against moisture? Do you want to avoid future problems like mold or warping caused by hidden dampness? Discover why underlayments1 and vapor barrier2s are vital for a successful basement floor.
Crucial underlayments or vapor barriers are essential for basement LVP flooring to prevent moisture transmission from the concrete slab. A good vapor barrier, often a thick polyethylene sheeting or integrated into the LVP itself, creates a protective seal, safeguarding the flooring from dampness, mold, and potential damage.
The Unseen Shield Beneath Your Floor
For any B2B buyer or distributor like Aiden in the UK, understanding underlayments and vapor barriers for basement LVP is non-negotiable. It’s the unseen hero that protects the visible floor. My team at CloudsFlooring manufactures LVT and SPC designed to be waterproof, but even the best waterproof material needs proper support against subfloor moisture. Without adequate protection, moisture can seep through the concrete, leading to costly issues down the line. Proper underlayments and vapor barriers are essential to protect LVP flooring from moisture and enhance comfort and performance in basements.
Here are the crucial underlayments and vapor barriers needed for basement flooring:
-
The Purpose of a Vapor Barrier:
- A vapor barrier acts as a shield, preventing water vapor from migrating from the concrete subfloor up into the LVP flooring. Basements are typically humid environments, and concrete is porous, allowing moisture to slowly pass through.
- This moisture can lead to several problems: it can compromise adhesives, cause planks to swell or warp, and create an environment ripe for mold and mildew growth beneath the flooring. A vapor barrier mitigates these risks by creating a physical separation and blocking moisture transmission.
-
Types of Vapor Barriers:
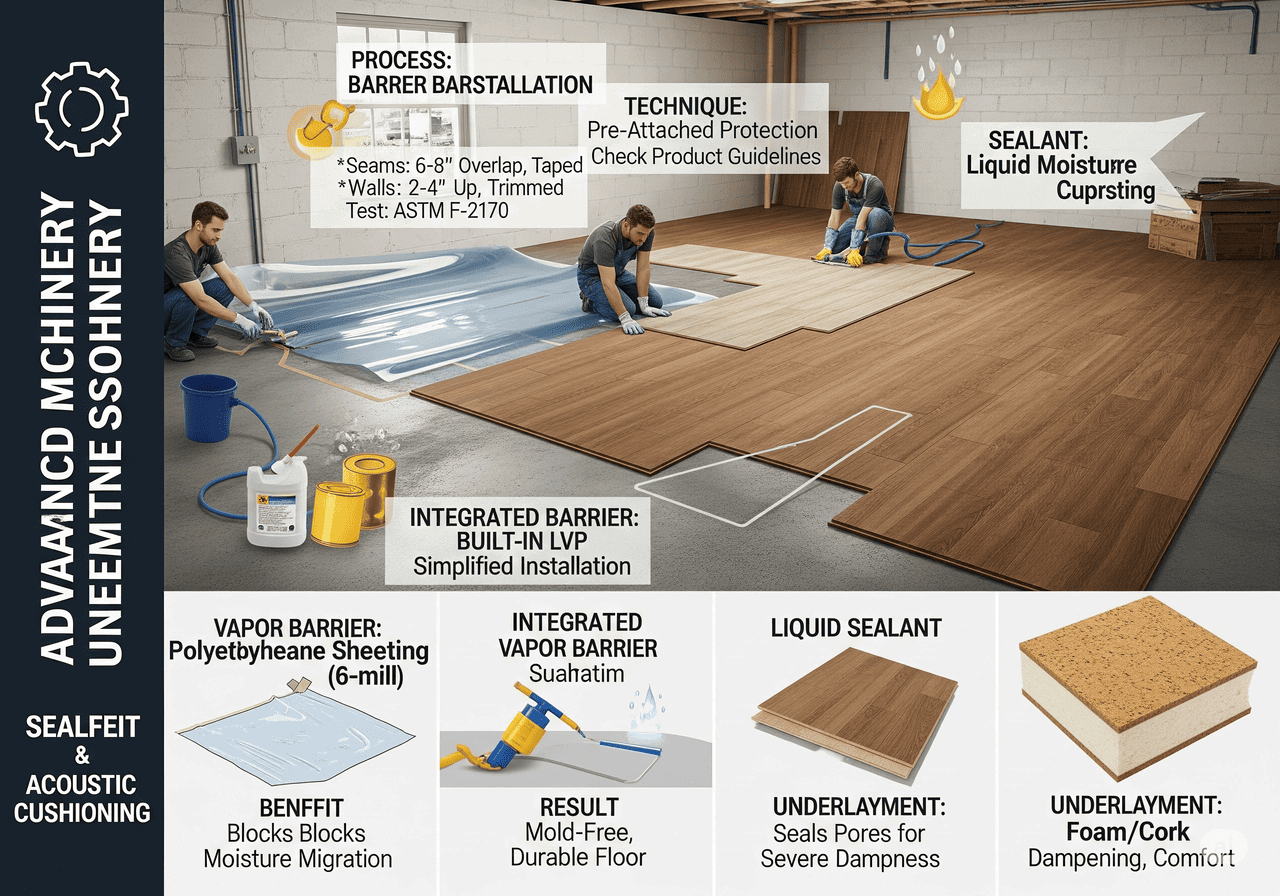
- Polyethylene Sheeting: A common and effective choice is a thick sheet of polyethylene plastic, typically 6-mil or thicker. This sheet is laid over the entire concrete subfloor, with seams overlapped and taped to create a continuous, impenetrable barrier. This is a robust solution for floating LVP installations.
- Integrated Vapor Barrier: Some underlayments include a built-in vapor barrier, simplifying the installation process. Many modern LVP products, especially those designed for basements or high-moisture areas, come with an integrated or pre-attached vapor barrier. This simplifies installation by combining two layers into one. This is what we see in "LVP flooring with a built-in vapor barrier" which offers superior waterproof performance.
- Liquid Moisture Suppressants/Sealants: For concrete subfloors with persistent moisture issues, a liquid moisture suppressant or epoxy concrete sealer can be applied directly to the concrete. This penetrates and seals the concrete’s pores, effectively blocking moisture vapor from rising. This might be used in conjunction with or instead of a separate vapor barrier, depending on the product and moisture severity.
-
Underlayments (Beyond Vapor Barriers):
- While often confused, not all underlayments are vapor barriers. Some underlayments provide sound dampening, extra cushioning, or thermal insulation.
- Choose an underlayment designed for LVP, such as foam or cork, which provides cushioning, sound reduction, and additional moisture protection. Examples include products like Technoflex Premium Acoustic Underlayment, which offers sound dampening and moisture resistance.
- However, in basements, if a separate underlayment is used, it should also include vapor barrier properties or be installed over a dedicated vapor barrier. Some LVP manufacturers specify certain types of underlayments or prohibit others, so always check product guidelines. Using the wrong underlayment can trap moisture or void warranties.
- Considerations: Ensure the underlayment allows minor water flow to prevent mold growth, as some materials can trap moisture if not designed for basements.
-
Installation of Vapor Barriers:
- Ensure the subfloor is perfectly clean and dry before laying the vapor barrier. Test the subfloor for moisture before installation, following standards like ASTM F-2170 for concrete.
- Lay the sheeting flat, overlapping seams by at least 6-8 inches and taping them with moisture-resistant tape.
- Extend the vapor barrier up the walls slightly (often 2-4 inches) and trim it after the LVP installation, underneath the baseboards. This creates a continuous "bathtub" effect, providing comprehensive protection.
Properly selected and installed underlayments or vapor barriers are not just an option but a critical component of successful LVP flooring in basements, ensuring your investment remains durable and free from moisture-related issues.
| Type of Barrier/Underlayment | Primary Function | Application in Basements |
|---|---|---|
| Polyethylene Sheeting | Blocks water vapor migration | Laid over concrete, seams taped, extends up walls. |
| Integrated Vapor Barrier | Combined moisture block and LVP layer | Part of specific LVP products, simplifies installation. |
| Liquid Sealants | Seals concrete pores | Applied directly to concrete for severe moisture, may supplement other barriers. |
| Acoustic/Cushioning Underlayment | Sound dampening, comfort, insulation | Must also have vapor barrier properties or be used over one. |
What are the Important Selling Points and Product Characteristics for Basement Flooring?
Are your clients looking for basement flooring that offers more than just aesthetics? Do you want to highlight the true value and long-term benefits of quality LVP for their projects? Understand the key selling points that make LVP ideal for basements.
Important selling points for basement LVP flooring include its superior waterproof capabilities, exceptional durability against heavy traffic, and ease of maintenance. Key characteristics are its ability to mimic natural materials, comfort underfoot, and suitability for various applications, offering aesthetic appeal alongside high performance.
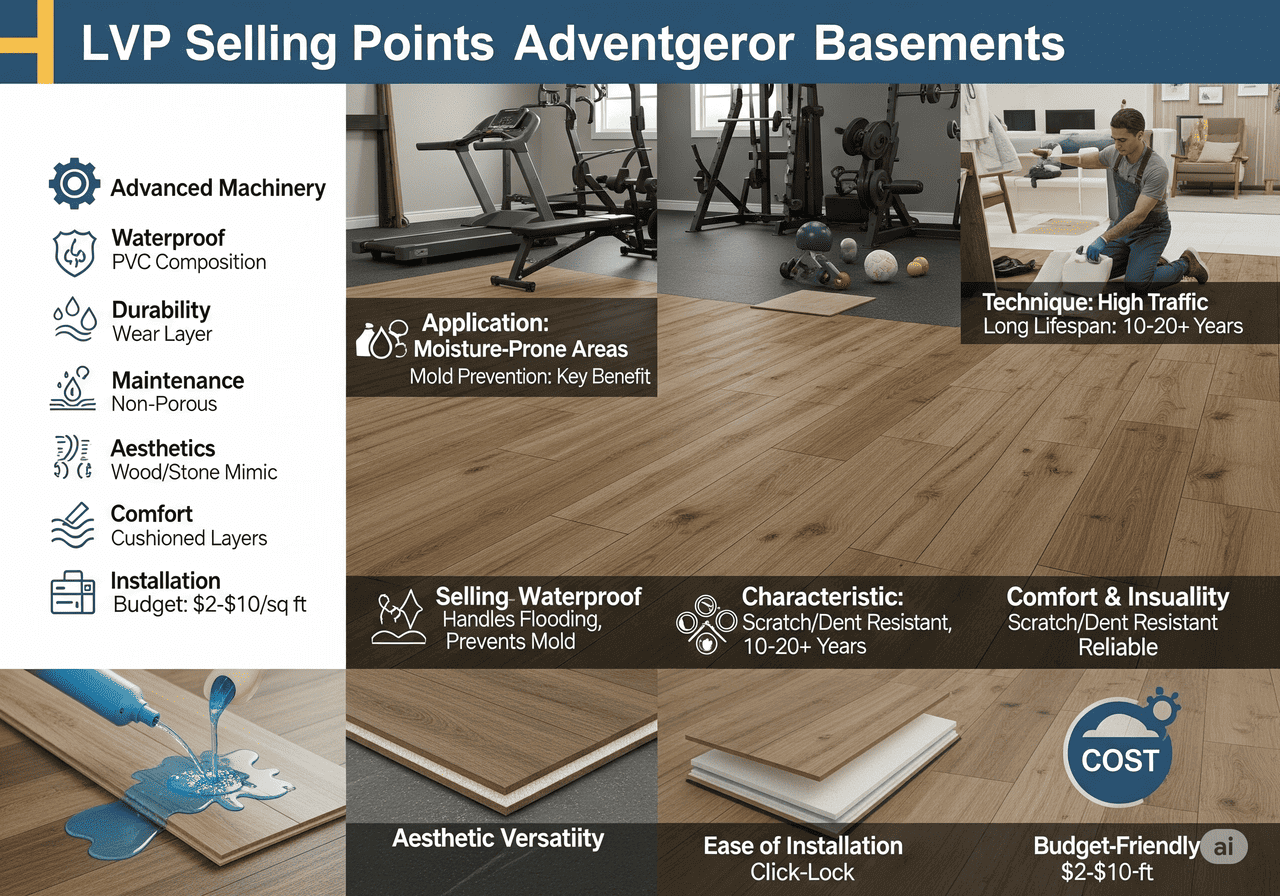
Highlighting the Value of CloudsFlooring LVP in Basements
As Jessica, I understand that for B2B buyers like Aiden and Lori, it is not just about the product itself but how it solves their pain points and adds value to their projects. Our LVT and SPC flooring from CloudsFlooring offers specific advantages that make it an ideal choice for challenging basement environments. We focus on providing top-quality, rare styles with customizable logos, ensuring our products stand out in the market. Vinyl flooring, made from synthetic materials like PVC, truly excels in these settings. LVP is a highly suitable flooring option for basements due to its combination of practicality, durability, and aesthetic appeal.
Here are the important selling points and product characteristics for basement flooring:
-
Superior Waterproofing and Moisture Resistance:
- This is the number one selling point for basements. LVP is inherently water-resistant, with many varieties being completely waterproof. It can handle occasional flooding and is moisture-resistant, making it ideal for basements. This characteristic makes it immune to mold and mildew growth that can plague other flooring options in humid basement conditions. It offers excellent water resistance, suitable for high-moisture areas.
- For our LVT and SPC, this means peace of mind for clients, knowing their floor can withstand accidental spills, minor leaks, or ambient basement humidity without damage or costly replacement. This is a critical factor for buyers like Aiden, who are sensitive to quality and long-term performance.
-
Exceptional Durability and Longevity:
- LVP is known for its durability. It is designed to withstand heavy traffic and resist wear and tear. It is resistant to scratches and dents, suitable for high-traffic areas. Our CloudsFlooring products, manufactured in state-of-the-art facilities with three LVT and two SPC production lines, are engineered for high resilience. This makes LVP suitable for basements that are transformed into living spaces, home gyms, playrooms, or even workshops.
- It resists scratches, scuffs, and impacts, maintaining its appearance even under frequent use. This long lifespan (typically 10-15 years, with high-quality options lasting up to 20 years or more) offers a significant return on investment for large company buyers .
-
Ease of Maintenance and Sanitation:
- LVP is incredibly easy to clean. Its smooth, non-porous surface repels dirt, dust, and stains, making routine sweeping and mopping simple. This low-maintenance aspect is a huge draw for busy commercial environments or residential properties with heavy use.
- From a hygiene perspective, LVP does not trap allergens or dust mites, unlike carpets. This contributes to better indoor air quality, which is vital for creating healthy and functional basement spaces. It requires only regular sweeping and occasional mopping.
-
Aesthetic Versatility and Design Appeal:
- Our LVT and SPC come in a wide range of styles, colors, and patterns, expertly mimicking natural materials like wood and stone. Vinyl also comes in a wide range of styles, colors, and patterns. This allows clients to achieve a high-end, sophisticated look in their basements without the drawbacks of genuine hardwood (like moisture sensitivity) or real stone (coldness).
- This aesthetic flexibility means LVP can complement any interior design, from rustic to contemporary, enabling clients to transform often dreary basements into vibrant living areas, gyms, or entertainment rooms. Our "rare style" offerings further enhance this appeal. LVP offers extensive design options .
-
Comfort Underfoot and Insulation Properties:
- While LVP is durable, its layered construction provides comfort underfoot due to its cushioned layers. This makes it softer and warmer underfoot compared to tile or concrete.
- LVP also offers good insulation properties. This contributes to a warmer basement environment, which can be particularly appealing in colder climates like North America and the UK. This adds to the overall comfort and energy efficiency of the space.
-
Ease of Installation:
- The straightforward installation process for LVP is simple for DIY enthusiasts and professionals alike. It uses click-lock systems, making it DIY-friendly with minimal tools. This makes it a popular choice for both residential and commercial spaces.
-
Budget-Friendly:
- Compared to other flooring options, vinyl is remarkably budget-friendly. The price range is typically $2–$10 per square foot, with additional installation costs of $2–$6 per square foot. These features make vinyl flooring a versatile and budget-friendly choice, catering to various needs and preferences.
| Selling Point | Product Characteristic for LVP | Benefit for Basement Application |
|---|---|---|
| Waterproof | Impervious to moisture (PVC composition); handles occasional flooding | Prevents mold, warping, adhesive failure; ideal for damp areas. |
| Durability | Wear layer, layered construction, resists impacts; scratch/dent resistant | Withstands heavy traffic, long lifespan, reduces replacement costs. |
| Easy Maintenance | Non-porous surface, resists stains; requires regular sweeping/mopping | Simple cleaning, hygienic, good for spills. |
| Aesthetic Versatility | Mimics wood/stone; wide range of designs/colors | Transforms dreary basements into appealing spaces, matches any decor. |
| Comfort & Insulation | Cushioned layers ; softer and warmer underfoot | More comfortable than concrete/tile, contributes to warmer basement. |
| Ease of Installation | Click-lock system; simple for DIY/professionals | Reduces labor costs and complexity. |
| Budget-Friendly | Cost-effective compared to other options | Affordable solution for various project sizes. |
How Does Basement Flooring Ensure Compatibility with Radiant Heating Systems?
Are your clients considering radiant heating for their basement and need compatible flooring? Do you know how to ensure their LVP choice works seamlessly with this heating method? Understand the key factors for pairing basement flooring with radiant heating.
While LVP flooring generally has good compatibility with radiant heating systems, it is crucial to ensure the flooring is rated for such use by the manufacturer. Key considerations include maintaining consistent, moderate temperatures, avoiding rapid temperature changes, and using proper installation techniques to prevent material stress and ensure efficient heat transfer.
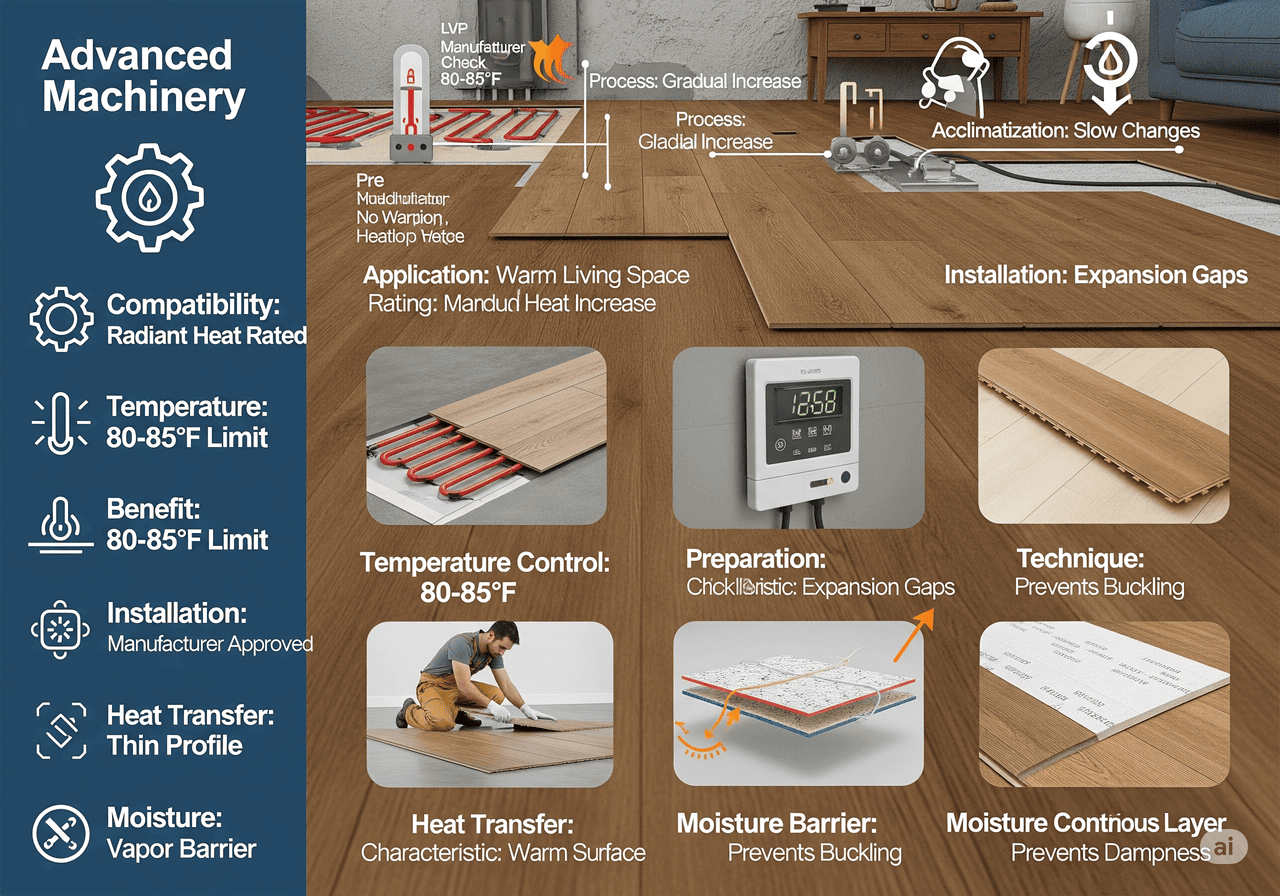
Warming Up to LVP and Radiant Heat
As Jessica, I know that for many large company buyers, especially in colder climates, radiant heating is a desirable feature for transforming a basement into a comfortable living space. While the provided reference materials specifically mention ceramic and porcelain tiles as benefiting from radiant heating, the compatibility of LVP with these systems is a common and important question I receive. Our LVT and SPC are premium quality, and understanding their thermal properties is key for successful radiant heat integration. LVP can be compatible with radiant heating systems1, but compatibility depends on the specific product and proper installation.
Here is how basement flooring, specifically LVP, ensures compatibility with radiant heating systems:
-
Compatibility Requirements:
- The most critical factor for LVP over radiant heat is maintaining consistent and moderate temperatures. Select LVP rated for radiant heat, typically able to withstand temperatures up to 80–85°F (26.7-29.4°C) without warping or deteriorating. Exceeding this limit can cause thermal expansion beyond the material’s tolerance, leading to buckling, gapping, or adhesive failure (if applicable).
- Verify manufacturer guidelines to ensure the flooring is suitable for radiant heating.
- Install a radiant heat barrier between the heating system and the flooring to prevent discoloration and extend the flooring’s lifespan.
-
Installation Steps:
- Avoid rapid temperature fluctuations. The radiant heating system should be turned on gradually and increased slowly over several days when initially activated or after a long period of being off. This allows the LVP to adjust slowly to the temperature changes, minimizing stress on the planks and seams.
- Ensure the radiant heating system is installed and tested before laying the LVP.
- Acclimatize the flooring to the environment to prevent expansion issues.
- Proper installation techniques are paramount. For floating LVP (click-lock systems), ensure adequate expansion gaps are left around the perimeter of the room. This allows the planks to expand and contract naturally with temperature changes without putting undue pressure on the system.
- For glue-down LVP over radiant heat, using a high-quality, flexible, and heat-resistant adhesive is essential. The adhesive must be able to withstand the thermal cycling without losing its bond.
-
Heat Transfer Efficiency and Benefits:
- LVP’s relatively thin profile and good thermal conductivity allow for efficient heat transfer from the radiant coils to the floor surface. This means the heating system does not need to work excessively hard to warm the room, contributing to energy efficiency.
- Thicker underlayments, especially those with high insulation values, can reduce heat transfer efficiency. If an underlayment is used, it should be thin and designed for use with radiant heat to ensure optimal performance.
- LVP’s flexibility allows it to handle temperature changes without structural damage. This enhances basement comfort by providing a warm surface.
-
Moisture Barrier Integration:
- Even with radiant heating, a basement still requires a vapor barrier. The heat can exacerbate moisture issues by drawing moisture up from the concrete. Ensure the radiant heating system is installed in a way that allows for a continuous vapor barrier beneath the LVP, preventing moisture from affecting both the flooring and the heating elements.
By carefully considering these factors, you can confidently recommend and install CloudsFlooring’s LVP in basements equipped with radiant heating systems, providing clients with a warm, durable, and comfortable space.
| Compatibility Aspect | Key Factor for LVP with Radiant Heat | Importance/Result |
|---|---|---|
| Material Rating | LVP must be explicitly rated "radiant heat compatible" by manufacturer. | Ensures material won’t warp or degrade; validates warranty. |
| Temperature Control | Maintain surface temp below 80–85°F; avoid rapid changes. | Prevents excessive expansion/contraction, buckling, or gapping. |
| Heat Transfer | Thin profile, good conductivity, suitable underlayment. | Efficient and effective heating of the living space. |
| Installation | Adequate expansion gaps for floating; flexible adhesive for glue-down. | Accommodates thermal movement; maintains structural integrity. |
| Moisture Barrier | Continuous vapor barrier beneath LVP and heating system. | Prevents moisture-related issues, even with added heat. |
What Are the Pros and Cons of LVP Flooring Versus Epoxy Coatings for Basement Applications?
Are you weighing LVP against epoxy for your basement projects, unsure which offers the best fit? Do you need a clear comparison of their advantages and disadvantages for these specific applications? Understand the trade-offs between LVP and epoxy for informed decision-making.
LVP flooring offers strong water resistance, diverse aesthetic appeal, and easier, often DIY-friendly installation for basements. However, it can be more expensive than epoxy and cannot be refinished. Epoxy coatings provide superior durability, chemical resistance, and a seamless waterproof barrier, though they are cold underfoot and require professional application.
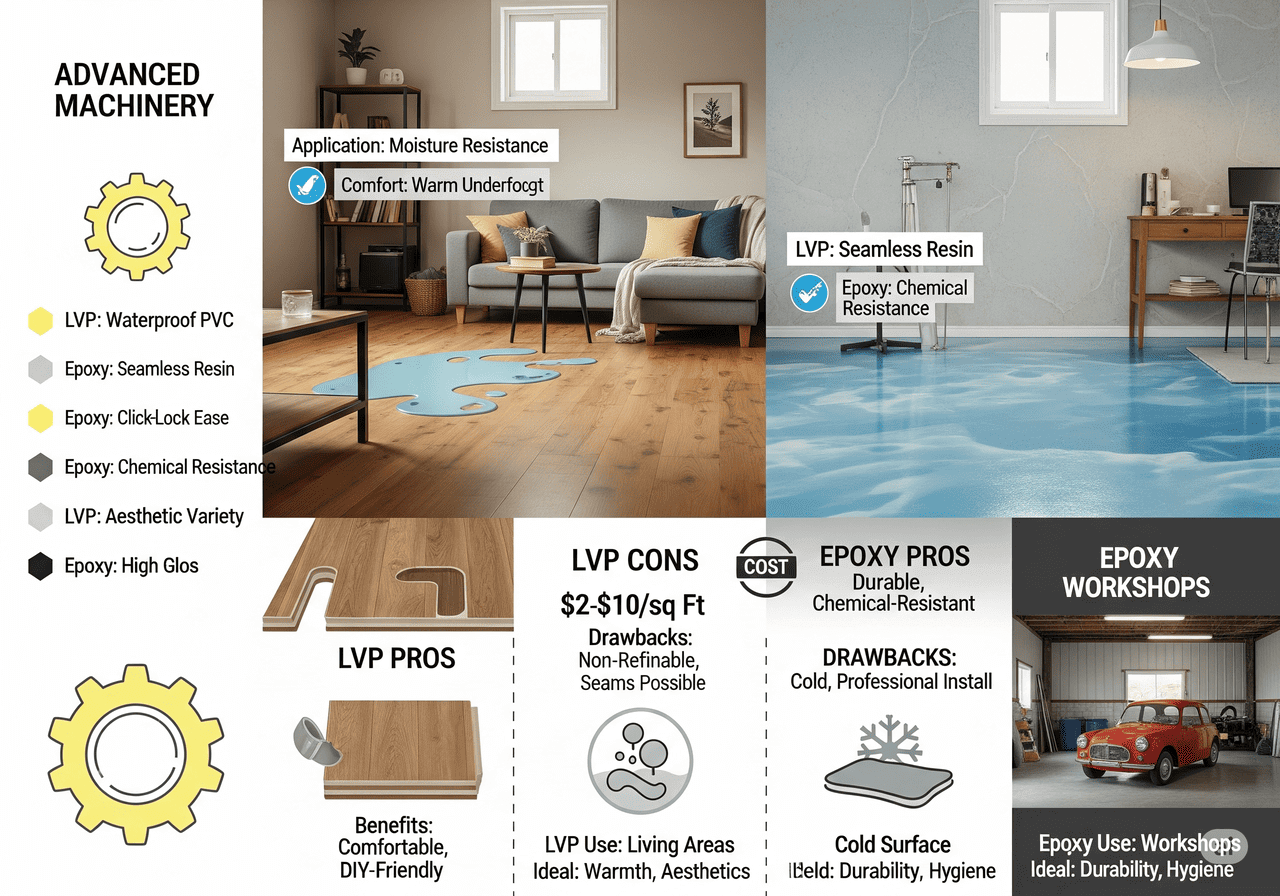
Making the Right Choice: LVP or Epoxy?
For B2B buyers like Lori, the COO who prioritizes quality and competitive pricing for SPC flooring, comparing LVP with other options like epoxy coatings is essential. Both are popular choices for basements, but they cater to different needs and priorities. As Jessica, I’ve seen firsthand how each performs, and understanding their unique pros and cons helps guide clients to the best solution for their specific projects. CloudsFlooring specializes in LVT and SPC, which aligns with LVP, but it’s important to provide a balanced perspective. When choosing between LVP and epoxy coatings for basement flooring, consider the intended use of the space, as each has distinct advantages and limitations.
Here are the pros and cons of LVP flooring versus epoxy coatings for basement applications:
-
LVP Flooring (Luxury Vinyl Plank/Tile):
- Pros:
- Aesthetically Pleasing: Mimics wood or stone, offering a wide range of designs. Our rare styles are a great example.
- Easy to Install: Features click-lock systems, making it suitable for DIY installation or quicker professional installs.
- Waterproof and Moisture-Resistant: LVP can handle occasional flooding and is highly moisture-resistant, preventing mold and mildew.
- Comfortable and Warm Underfoot: Its cushioned layers offer comfort and can be warmer than tile or concrete.
- Durable: Resistant to scratches and dents, suitable for high-traffic areas.
- Wide Range of Styles and Colors: Provides extensive design options.
- Can Be Installed Over Existing Floors: In some cases, LVP can be laid directly over existing flooring.
- Cons:
- Cost: Can be more expensive than epoxy, with a price range of $2–$10 per square foot for materials.
- Refinishing: Cannot be refinished; damaged planks require replacement.
- Durability (vs. Epoxy): While durable, it is less durable than epoxy in high-traffic or heavy-use areas.
- Seams: While often tight, LVP planks and tiles have seams that, if not properly installed or maintained, could potentially allow moisture to get trapped underneath in severe cases.
- Environmental Impact: Made from synthetic PVC, which is less environmentally friendly than some natural materials, and its recyclability can be limited.
- Pros:
-
Epoxy Coatings:
- Pros:
- Extremely Durable and Long-Lasting: Withstands heavy traffic, impacts, abrasions, and chemicals better than vinyl, lasting 10-20 years or more .
- Seamless and Easy to Clean: Creates a continuous, non-porous surface, making it impervious to liquid spills and excellent for sanitation and hygiene.
- Resistant to Chemicals, Stains, and Moisture: Offers enhanced protection against moisture and chemicals.
- Customizable: Available in solid colors, metallic finishes, and can include decorative flakes.
- Cost-Effective in the Long Run: Its durability and minimal maintenance contribute to long-term value.
- Cons:
- Cold Underfoot: Can feel cold and hard underfoot, making it less comfortable for living spaces.
- Requires Professional Installation: The complex application process often requires specialized equipment and professional expertise, increasing initial costs.
- Can Be Slippery When Wet: Might require additives for slip resistance.
- Less Forgiving of Subfloor Imperfections: Requires thorough subfloor preparation for proper adhesion.
- Limited Aesthetic Options: While customizable, it offers fewer realistic patterns compared to LVP.
- VOC Emissions: Can emit volatile organic compounds (VOCs) during application.
- Pros:
Choosing between LVP and epoxy for a basement depends on the intended use, budget, aesthetic preferences, and tolerance for installation complexity. LVP flooring is ideal for basement living spaces like family rooms or home theaters, where comfort, warmth, and aesthetics are priorities. Epoxy is best for utility areas like workshops, gyms, or garages, where durability and chemical resistance are more important.
| Feature | LVP Flooring | Epoxy Coatings |
|---|---|---|
| Composition | Polyvinyl chloride (PVC), layered construction | Resin and hardener mixture, applied over concrete |
| Durability | Good for residential/light commercial; resistant to scratches | Extremely durable; resists heavy traffic, chemicals, impacts |
| Waterproofing | High water resistance; many waterproof variants | Excellent; forms seamless, non-porous barrier |
| Aesthetics | Wide range of designs (wood/stone look); comfortable feel | High-gloss, modern/industrial; limited patterns |
| Installation | Easier, often DIY-friendly (click-lock); quicker | Complex, multi-step; usually requires professional application |
| Maintenance | Low maintenance (sweeping, mopping) | Low maintenance (cleaning spills); periodic resealing needed |
| Lifespan | 10-15 years (up to 20 for high-quality) | 10-20 years (or more); very long-lasting |
| Cost | Lower initial installation cost ($2–$10/sq ft material) | Higher initial installation cost ($3–$12/sq ft DIY, $15–$30/sq ft pro) |
| Ideal Use | Finished basements, living areas, playrooms, offices | Workshops, garages, high-traffic commercial spaces |
How to Install LVP Flooring in a Basement: Step-by-Step?
Are you ready to tackle your basement LVP installation but need a clear, actionable guide? Do you want to ensure each step is completed correctly for a professional and lasting finish? Follow these essential steps for a successful basement flooring project.
To install LVP flooring in a basement, first thoroughly test the subfloor for moisture and prepare it by leveling and cleaning. Then, lay a 6-mil plastic vapor barrier, followed by an LVP-compatible underlayment if needed. Plan your layout, then use the click-lock system to install planks, ensuring proper expansion gaps, and finish by reinstalling baseboards.
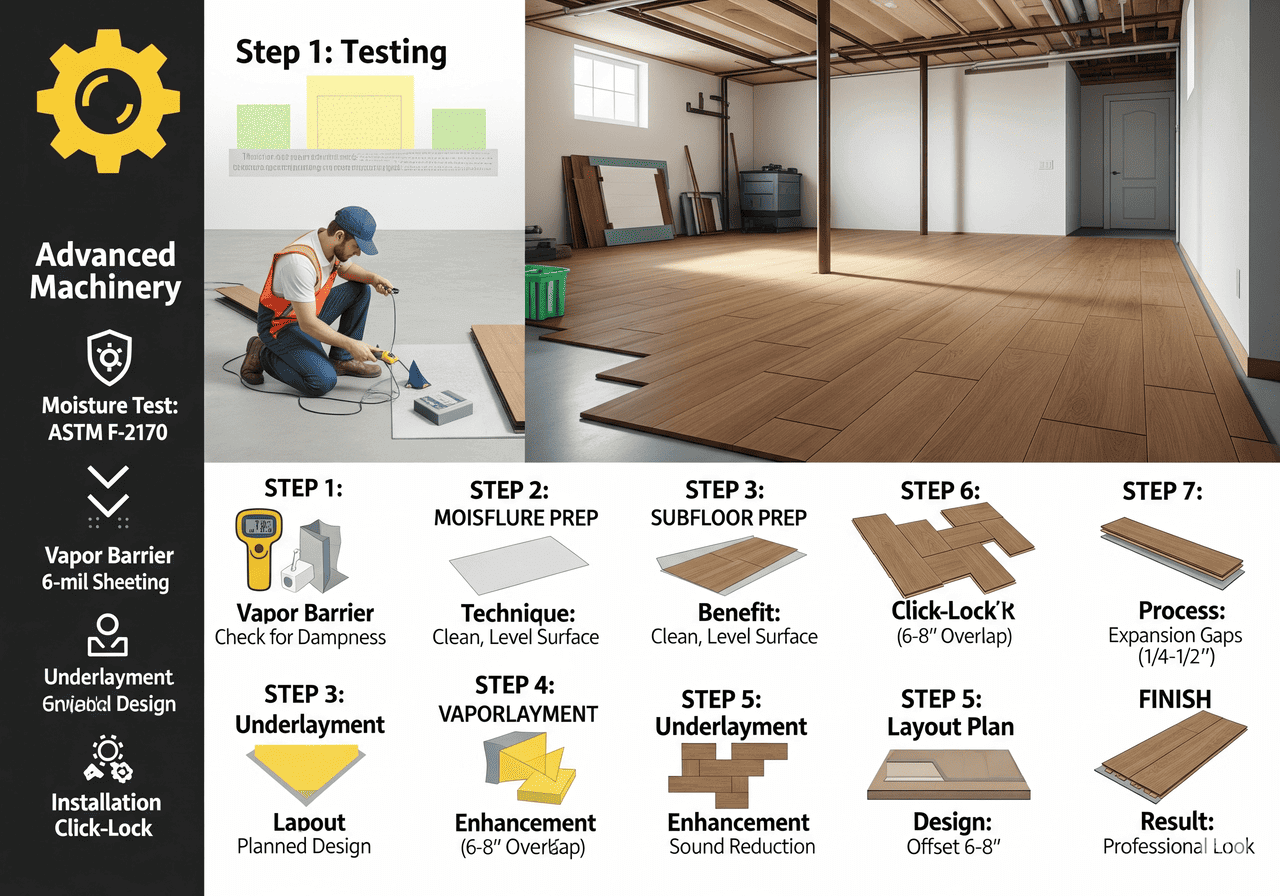
Laying the Foundation for a Durable Basement Floor
For B2B buyers and installers, having a clear, step-by-step guide is crucial for efficiency and quality control. At CloudsFlooring, we emphasize that even with our top-tier LVT and SPC products, correct installation is key to unlocking their full potential. This practical guide builds on the preparations and considerations we have already discussed, translating them into actionable steps for a smooth basement LVP installation.
Here are the step-by-step instructions for installing LVP in basements:
-
Step 1: Test for Moisture:
- Before anything else, you must ensure the concrete subfloor is dry. Use a moisture meter to check moisture levels, following industry standards like ASTM F-2170. This test will tell you if the concrete is releasing too much moisture, which could damage your LVP.
- If moisture levels are high, you need to address the source first, perhaps by sealing cracks or improving exterior drainage.
-
Step 2: Prepare the Subfloor:
- The subfloor must be clean, dry, and level. Clean the concrete thoroughly, removing all dirt, dust, and debris. Any debris left behind can cause bumps or prevent proper adhesion.
- Level uneven concrete areas with a self-leveling cement compound. Fill any cracks or holes with a concrete patcher. A smooth, flat surface is essential for the LVP to lay correctly and prevent issues like gapping or buckling.
-
Step 3: Install Vapor Barrier:
- Lay a 6-mil plastic sheeting over the entire concrete subfloor. This acts as your primary vapor barrier, blocking moisture from rising from the concrete and affecting the LVP.
- Overlap the seams by at least 6-8 inches and tape them securely with moisture-resistant tape. Extend the sheeting 2-4 inches up the walls to create a continuous moisture seal, which you will trim later.
-
Step 4: Add Underlayment (if applicable):
- If your LVP does not have an integrated underlayment or vapor barrier, install a separate underlayment1 designed for LVP. A foam or cork underlayment can provide cushioning, sound reduction, and additional moisture protection.
- Ensure the underlayment is compatible with LVP and any radiant heating systems if present. Some underlayments are specifically designed to allow minor water flow to prevent moisture trapping.
-
Step 5: Plan the Layout:
- Before you start laying planks, plan your layout. This ensures a professional finish and minimizes waste.
- Start with the first row of planks parallel to the most prominent wall in the basement. Consider how the light hits the floor and the direction of traffic.
- You may need to remove existing molding or baseboards around the perimeter. Plan for cutting planks to fit around obstacles like support columns or irregular walls.
-
Step 6: Install LVP:
- Begin laying the LVP planks using the click-lock system. Each plank should snap securely into place with the previous one. Use a rubber mallet and tapping block to ensure a tight fit, but avoid excessive force.
- Remember to leave an expansion gap (typically 1/4 to 1/2 inch) along all walls and fixed objects. This gap allows the flooring to expand and contract naturally with temperature and humidity changes without causing buckling or lifting.
- Stagger the end joints of adjacent rows to create a more stable and visually appealing floor. A good rule of thumb is to offset them by at least 6-8 inches.
-
Step 7: Finish:
- Once all the LVP planks are laid, reinstall the molding or add new baseboards around the perimeter of the room. This will cover the expansion gaps you left and give the floor a finished look.
- Clean any excess adhesive if you used a glue-down method. Perform a final cleaning of the floor to remove any dust or debris from the installation process.
By meticulously following these steps, you can ensure a successful and long-lasting LVP flooring installation in any basement project.
Conclusion
Successfully installing LVP in basements depends on overcoming moisture and subfloor challenges with thorough preparation. Choosing click-lock LVP with vapor barriers ensures moisture control. LVP offers aesthetics and durability, while compatibility with radiant heat requires specific product ratings. The choice between LVP and epoxy balances ease of installation and design against ultimate toughness. Step-by-step guidance ensures a professional finish.
The above data is for reference only.
